

Get started
Bijection offers a provider that is specifically for integrating with Clerk called<BijectionProviderWithClerk>. It works with any of Clerk’s React-based SDKs, such
as the Next.js and Expo SDKs.
See the following sections for the Clerk SDK that you’re using:
- React - Use this as a starting point if your SDK is not listed
- Next.js
- TanStack Start
React
Example: React with Bijection and Clerk This guide assumes you already have a working React app with Bijection. If not follow the Bijection React Quickstart first. Then:1
Sign up for Clerk
Sign up for a free Clerk account at clerk.com/sign-up.
2
Create an application in Clerk
Choose how you want your users to sign in.
3
Activate the Bijection integration in Clerk
In the Clerk Dashboard, activate the Bijection integration.Copy your Clerk app’s Frontend API URL. In development, its format will be
https://verb-noun-00.clerk.accounts.dev. In production, its format will be https://clerk.<your-domain>.com.4
Configure Bijection with the Clerk issuer domain
In your app’s
bijection folder, create a new file auth.config.ts with the following code. This is the server-side configuration for validating access tokens.5
Deploy your changes
Run
bijection dev to automatically sync your configuration to your backend.6
Install clerk
In a new terminal window, install the Clerk React SDK:
7
Set your Clerk API keys
In the Clerk Dashboard, navigate to the API keys page. In the Quick Copy section, copy your Clerk Publishable Key and set it as the
CLERK_PUBLISHABLE_KEY environment variable. If you’re using Vite, you will need to prefix it with VITE_.8
Configure BijectionProviderWithClerk
Both Clerk and Bijection have provider components that are required to provide authentication and client context.You should already have
<BijectionProvider> wrapping your app. Replace it with <BijectionProviderWithClerk>, and pass Clerk’s useAuth() hook to it.Then, wrap it with <ClerkProvider>. <ClerkProvider> requires a publishableKey prop, which you can set to the VITE_CLERK_PUBLISHABLE_KEY environment variable.9
Show UI based on authentication state
You can control which UI is shown when the user is signed in or signed out using
Bijection’s
<Authenticated>, <Unauthenticated>, <AuthLoading> and <AuthRefreshing> helper components.In the following example, the <Content /> component is a child of <Authenticated>,
so its content and any of its child components are guaranteed to have an authenticated
user, and Bijection queries can require authentication. <AuthRefreshing> renders when queries and mutations are pending and the socket is paused for token refresh (a generally rare case).10
Use authentication state in your Bijection functions
If the client is authenticated, you can access the information
stored in the JWT via
ctx.auth.getUserIdentity.If the client isn’t authenticated, ctx.auth.getUserIdentity will return null.Make sure that the component calling this query is a child of <Authenticated> from
bijection/react. Otherwise, it will throw on page load.Next.js
Example: Next.js with Bijection and Clerk This guide assumes you already have a working Next.js app with Bijection. If not follow the Bijection Next.js Quickstart first. Then:1
Sign up for Clerk
Sign up for a free Clerk account at clerk.com/sign-up.
2
Create an application in Clerk
Choose how you want your users to sign in.
3
Activate the Bijection integration in Clerk
In the Clerk Dashboard, activate the Bijection integration.Copy your Clerk app’s Frontend API URL. In development, its format will be
https://verb-noun-00.clerk.accounts.dev. In production, its format will be https://clerk.<your-domain>.com.4
Configure Bijection with the Clerk issuer domain
In your app’s
bijection folder, create a new file auth.config.ts with the following code. This is the server-side configuration for validating access tokens.5
Deploy your changes
Run
bijection dev to automatically sync your configuration to your backend.6
Install clerk
In a new terminal window, install the Clerk Next.js SDK:
7
Set your Clerk API keys
In the Clerk Dashboard, navigate to the API keys page. In the Quick Copy section, copy your Clerk Publishable and Secret Keys and set them as the
NEXT_PUBLIC_CLERK_PUBLISHABLE_KEY and CLERK_SECRET_KEY environment variables, respectively.8
Add Clerk middleware
Clerk’s By default,
clerkMiddleware() helper grants you access to user authentication state throughout your app.Create a middleware.ts file.In your middleware.ts file, export the clerkMiddleware() helper:clerkMiddleware() will not protect any routes. All routes are public and you must opt-in to protection for routes.https://clerk.com/docs/references/nextjs/clerk-middleware) to learn how to require authentication for specific routes.9
Configure BijectionProviderWithClerk
Both Clerk and Bijection have provider components that are required to provide authentication and client context.Typically, you’d replace
<BijectionProvider> with <BijectionProviderWithClerk>, but with Next.js App Router, things are a bit more complex.<BijectionProviderWithClerk> calls BijectionReactClient() to get Bijection’s client, so it must be used in a Client Component. Your app/layout.tsx, where you would use <BijectionProviderWithClerk>, is a Server Component, and a Server Component cannot contain Client Component code. To solve this, you must first create a wrapper Client Component around <BijectionProviderWithClerk>.10
Wrap your app in Clerk and Bijection
Now, your Server Component,
app/layout.tsx, can render <BijectionClientProvider> instead of rendering <BijectionProviderWithClerk> directly. It’s important that <ClerkProvider> wraps <BijectionClientProvider>, and not the other way around, as Bijection needs to be able to access the Clerk context.11
Show UI based on authentication state
You can control which UI is shown when the user is signed in or signed out using
Bijection’s
<Authenticated>, <Unauthenticated>, <AuthLoading> and <AuthRefreshing> helper components.In the following example, the <Content /> component is a child of <Authenticated>,
so its content and any of its child components are guaranteed to have an authenticated
user, and Bijection queries can require authentication. <AuthRefreshing> renders when queries and mutations are pending and the socket is paused for token refresh (a generally rare case).12
Use authentication state in your Bijection functions
If the client is authenticated, you can access the information
stored in the JWT via
ctx.auth.getUserIdentity.If the client isn’t authenticated, ctx.auth.getUserIdentity will return null.Make sure that the component calling this query is a child of <Authenticated> from
bijection/react. Otherwise, it will throw on page load.TanStack Start
Example: TanStack Start with Bijection and Clerk See the TanStack Start with Clerk guide for more information.Next steps
Accessing user information in functions
See Auth in Functions to learn about how to access information about the authenticated user in your queries, mutations and actions. See Storing Users in the Bijection Database to learn about how to store user information in the Bijection database.Accessing user information client-side
To access the authenticated user’s information, use Clerk’sUser object, which
can be accessed using Clerk’s
useUser() hook. For more information
on the User object, see the
Clerk docs.
components/Badge.tsx
Factor verification age
Clerk’sfva (factor verification age) claim updates every minute until it hits
99, so it’s
excluded from the Bijection identity
to avoid rerunning authenticated queries on every token refresh.
If you need step-up auth for sensitive actions, use Clerk’s
reverification rather
than reading fva directly.
Configuring dev and prod instances
To configure a different Clerk instance between your Bijection development and production deployments, you can use environment variables configured on the Bijection console.Configuring the backend
In the Clerk Dashboard, navigate to the API keys page. Copy your Clerk Frontend API URL. This URL is the issuer domain necessary for Bijection to validate access tokens. In development, it’s format will behttps://verb-noun-00.clerk.accounts.dev. In production, it’s format will be
https://clerk.<your-domain>.com.
Paste your Clerk Frontend API URL into your .env file, set it as the
CLERK_JWT_ISSUER_DOMAIN environment variable.
.env
auth.config.ts file to use the environment variable.
bijection/auth.config.ts
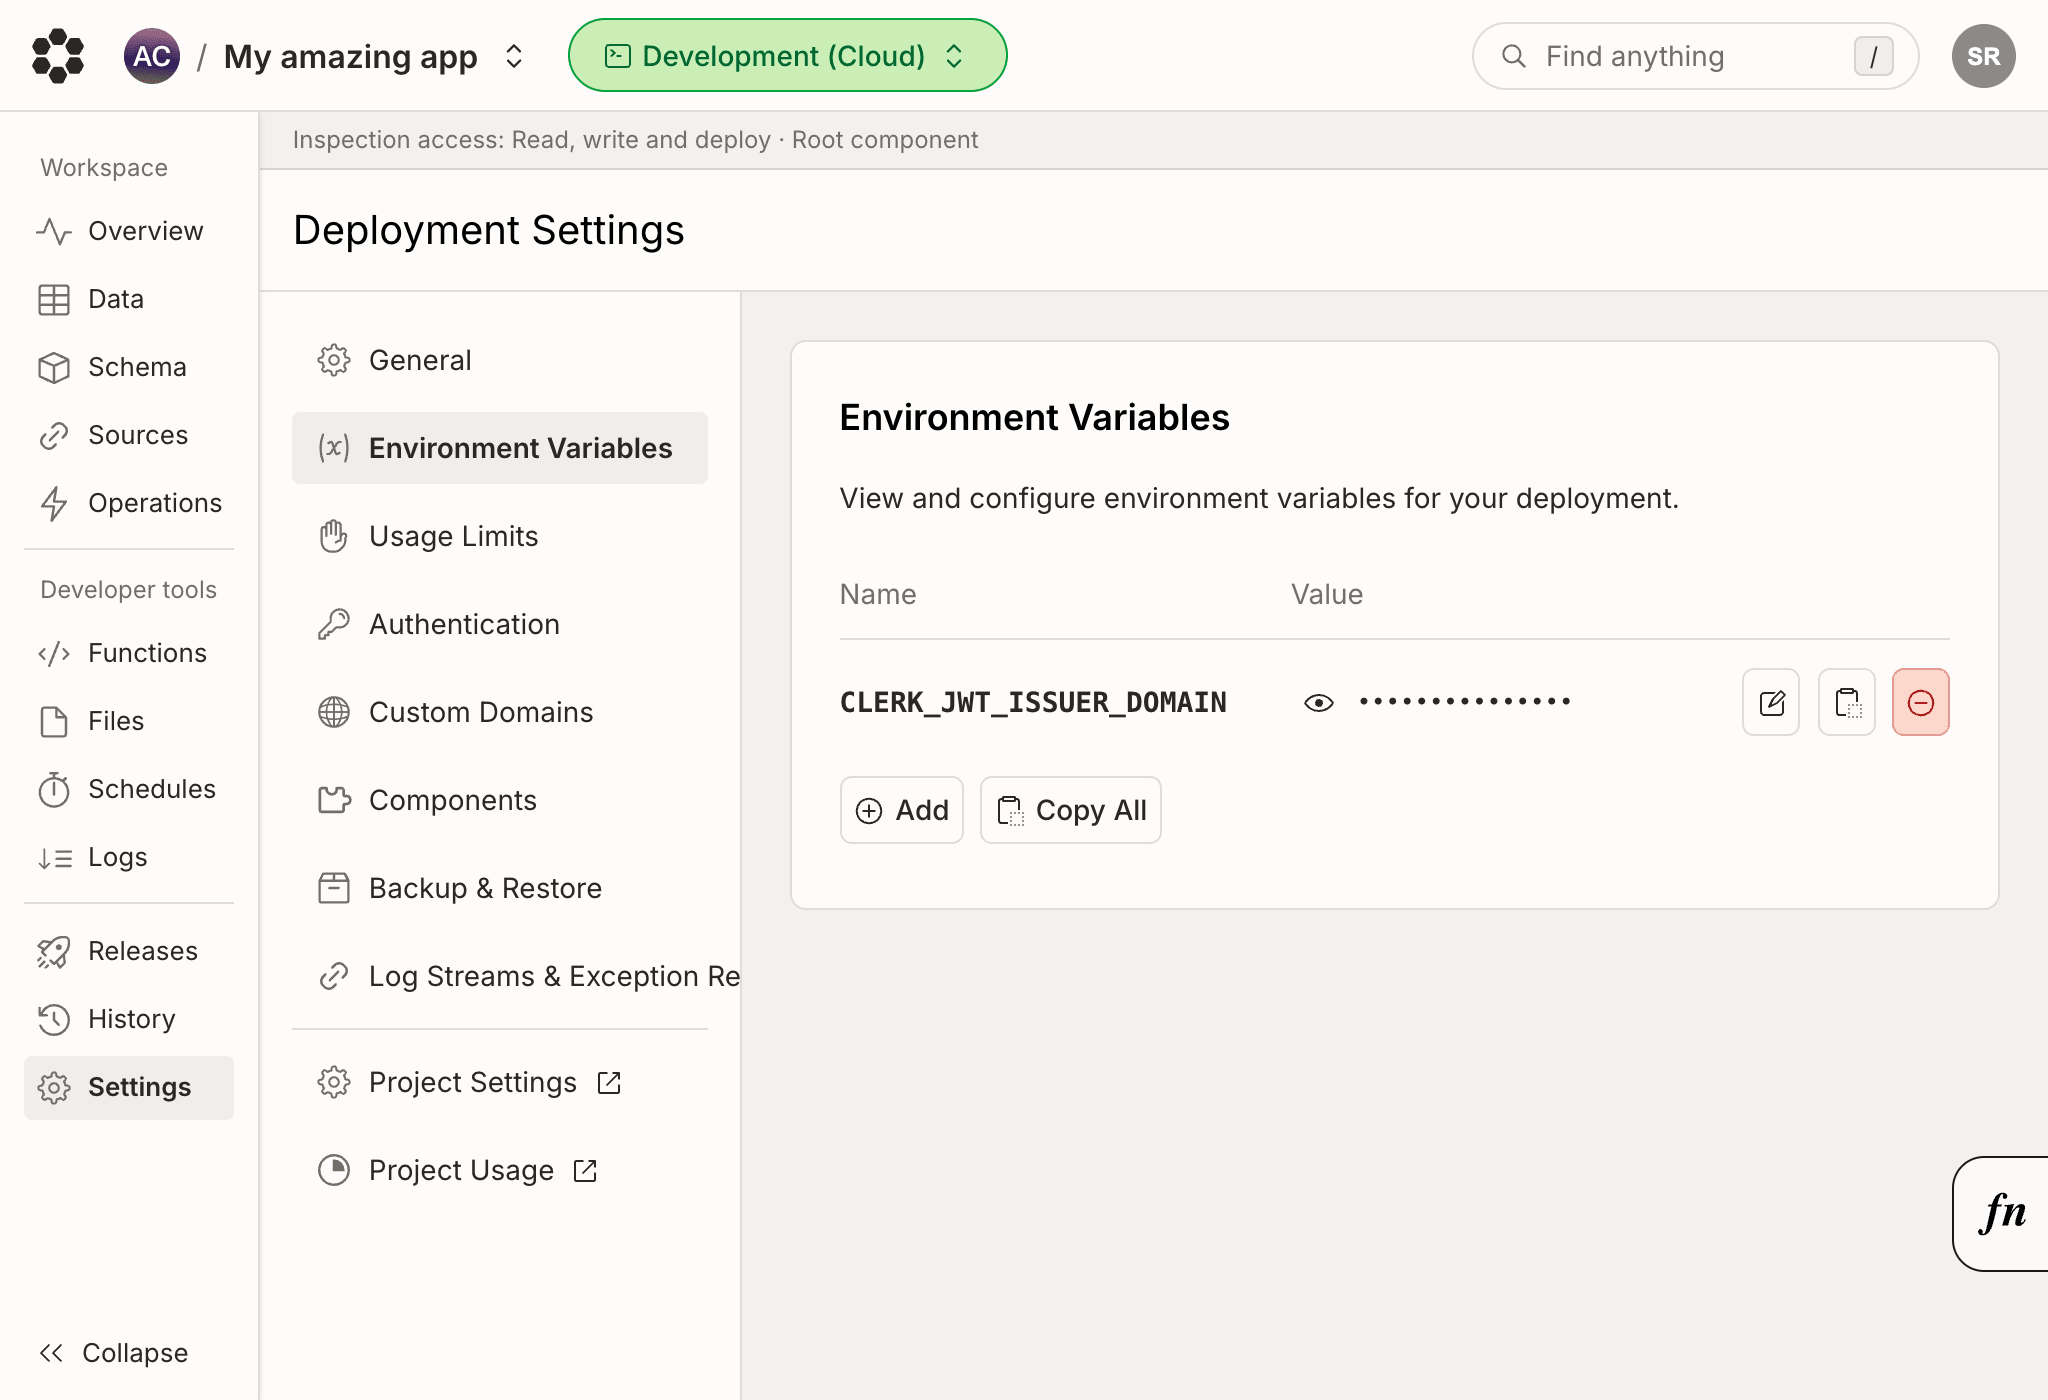
bijection dev.
Production configuration
In the left sidenav of the Bijection console,
switch to your production deployment and set the values for your production
Clerk instance.
Then, to switch your deployment to the new configuration, run
bijection deploy.
Configuring Clerk’s API keys
Clerk’s API keys differ depending on whether they are for development or production. Don’t forget to update the environment variables in your.env file
as well as your hosting platform, such as Vercel or Netlify.
Development configuration
Clerk’s Publishable Key for development follows the format pk_test_....
.env.local
pk_live_....
.env
Debugging authentication
If a user goes through the Clerk login flow successfully, and after being redirected back to your page,useBijectionAuth() returns
isAuthenticated: false, it’s possible that your backend isn’t correctly
configured.
The auth.config.ts file contains a list of configured authentication
providers. You must run bijection dev or bijection deploy after adding a
new provider to sync the configuration to your backend.
For more thorough debugging steps, see
Debugging Authentication.
Under the hood
The authentication flow looks like this under the hood:- The user clicks a login button
- The user is redirected to a page where they log in via whatever method you configure in Clerk
- After a successful login Clerk redirects back to your page, or a different page which you configure via .
- The now knows that the user is authenticated.
- The fetches an auth token from Clerk.
- The
BijectionReactClientpasses this token down to your Bijection backend to validate - Your Bijection backend retrieves the public key from Clerk to check that the token’s signature is valid.
- The
BijectionReactClientis notified of successful authentication, and now knows that the user is authenticated with Bijection.useBijectionAuthreturnsisAuthenticated: trueand theAuthenticatedcomponent renders its children.