> ## Documentation Index
> Fetch the complete documentation index at: https://docs.bijection.com/llms.txt
> Use this file to discover all available pages before exploring further.

# Working with Multiple Deployments

> Creating multiple deployments in a single project

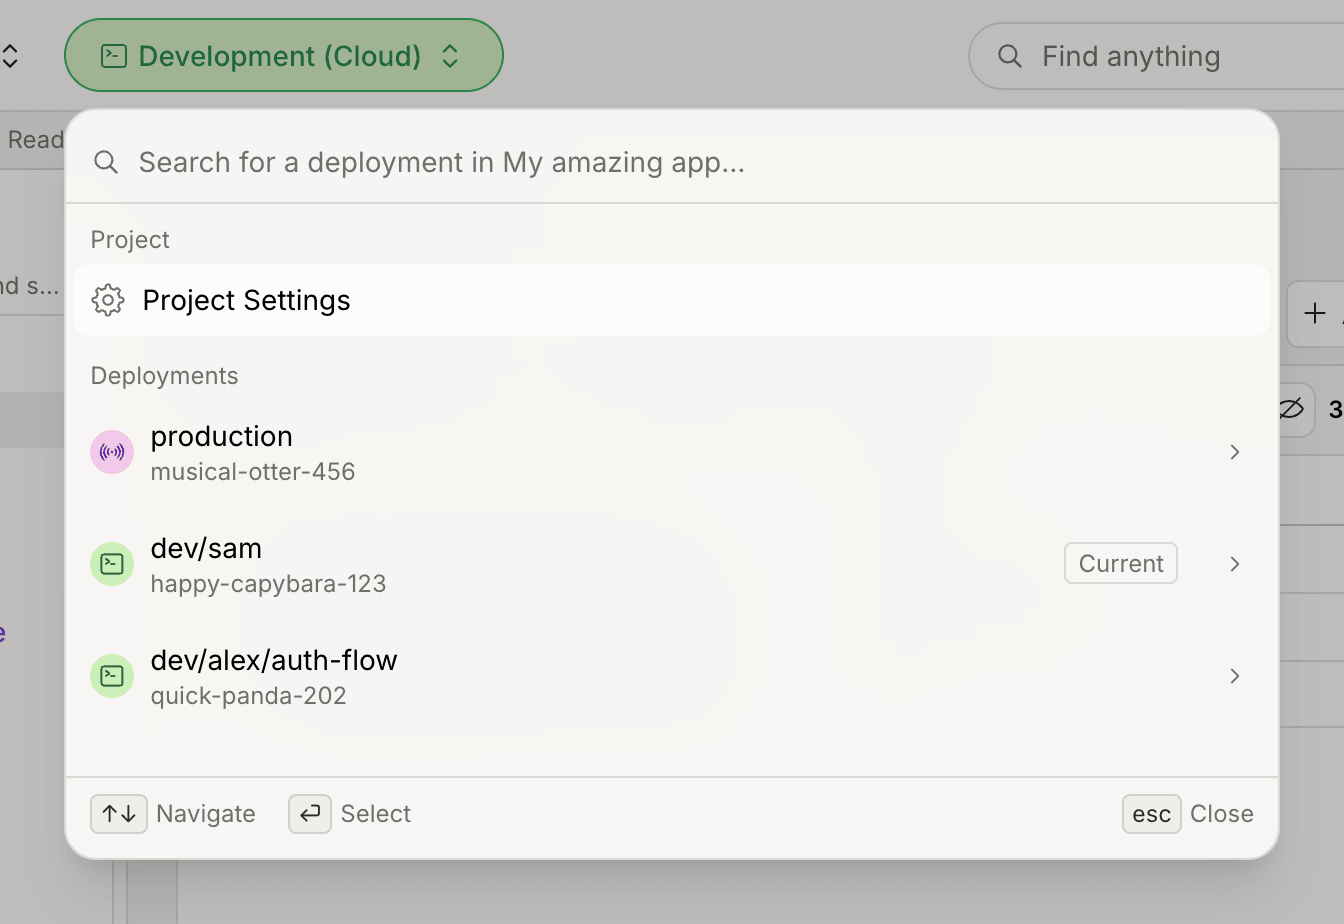
By default, each project has a single shared **prod deployment** and each
developer working on the project has their own **dev deployment**.

For more advanced use cases, you may want to create more cloud deployments. For
instance:

* Create a preview deployment for every feature branch you push.
* Give an isolated dev deployment to every coding agent.
* Shard your production workload across multiple deployments.
* Add a staging environment for your project.

<Frame>
  <img src="https://mintcdn.com/bijection-95ba84d3/f-zeSQU2ke_jvHT0/screenshots/pages_project_deployment_data_multiple_dev_deployments_selector.png?fit=max&auto=format&n=f-zeSQU2ke_jvHT0&q=85&s=864516ecadab11aad99988a6e854effb" alt="A project with multiple deployments in the console" width="1344" height="924" data-path="screenshots/pages_project_deployment_data_multiple_dev_deployments_selector.png" />
</Frame>

## Creating more deployments

### Using preview deployments

**Preview deployments** are a simple way to automatically create a temporary
deployment for each feature branch you create. These deployments are
automatically cleaned up after they expire (see
[Deployment types](#deployment-types)).
<Warning>
  Bijection preview deployments are in beta.
</Warning>

<Accordion title="Setting up preview deployments">
  Preview deployments can be automatically created using the `bijection deploy`
  command. You will need to set the `BIJECTION_DEPLOY_KEY` environment variable to a
  preview deploy key. You can generate a preview deploy key in the console from
  [the settings page of the project](https://console.bijection.com).

  To deploy code to a preview deployment, use:

  ```bash theme={"theme":{"light":"github-light-default","dark":"github-dark-default"}}
  bijection deploy --preview-name="my-preview-deployment-name"
  ```

  This command will create a preview deployment if needed and reuse the existing
  preview deployment and its data when one with the same name already exists.

  Use `--preview-create` instead of `--preview-name` to delete and recreate the
  preview deployment every time.

  If you’re deploying your code from
  [Vercel](/production/hosting/vercel#preview-deployments),
  [Netlify](/production/hosting/netlify#deploy-previews), Cloudflare Pages, or
  GitHub Actions, you can simply use `bijection deploy`. The preview name will
  automatically be determined. With that workflow, you can reuse the same deploy
  command for preview deployments and production deployments: for preview
  deployments, set the `BIJECTION_DEPLOY_KEY` environment variable to a preview
  deploy key, and in production, set it to your production environment’s deploy
  key.
</Accordion>

<Accordion title="Seeding initial data">
  If you want to automatically create sample data when a preview deployment is
  created, you can use `--preview-run`:

  ```bash theme={"theme":{"light":"github-light-default","dark":"github-dark-default"}}
  bijection deploy --preview-create="my-preview-deployment-name" --preview-run=<functionName>
  ```

  Replace `<functionName>` by the name of a Bijection function that will be ran if a
  preview deployment is created. `--preview-run` is ignored `bijection deploy`
  doesn’t create a preview deployment.

  Note that if the function call fails, the `deploy` command will fail, but the
  new preview deployment will have already been provisioned. Best course of action
  is to fix the issue in the function and redeploy.
</Accordion>

### From the command line

#### Interactively

To create a new deployment manually, run the following command in your project:

```sh theme={"theme":{"light":"github-light-default","dark":"github-dark-default"}}
bijection deployment create
```

This command will allow you to interactively choose the deployment type, region,
and reference for the new deployment.

#### From a script

`bijection deployment create` can be used non-interactively in setup scripts,
e.g. to provision a fresh dev deployment per CI run or per agent worktree:

```bash theme={"theme":{"light":"github-light-default","dark":"github-dark-default"}}
bijection deployment create <reference> --type=<type> [options] [--select]
# For instance:
# bijection deployment create dev/james/feature-payment-integration --type=dev --region us --expiration "in 7 days" --select
```

When including **`--select`**, the deployment you created will be used by the
`bijection` commands you run after.

The **reference** is a string that uniquely identifies the deployment within a
project. It must be 3 to 100 characters and contain only alphanumeric
characters, dashes, and slashes. The reference is used by the Bijection console
and by `bijection` to identify the deployment, so we recommend using
descriptive names.

For ready-made setup scripts that wire this into Codex, Conductor, Cursor
worktrees, and T3 Code, see
[Agent Mode → Worktree setups](/cli/background-agents#worktree-setups).

### Through the API

You can also create deployments
through the management API.

## Targeting different deployments

If you’re manually managing multiple dev deployments, you can use
`bijection deployment select` to change the deployment used by `bijection dev`
and other commands:

```bash theme={"theme":{"light":"github-light-default","dark":"github-dark-default"}}
# To select a deployment in the same project:
bijection deployment select dev/james/feature-payment-integration

# To select a deployment in another project:
bijection deployment select my-project:dev/james/feature-payment-integration

# To select a deployment in another team:
bijection deployment select my-team:my-project:dev/james/feature-payment-integration
```

<a id="deployment-flag" />

If you only need to run a single command on another deployment, you can use
`--deployment`:

```bash theme={"theme":{"light":"github-light-default","dark":"github-dark-default"}}
bijection env list --deployment dev/james/feature-payment-integration
```

### Scoping a deploy key to a single deployment

If you want to hand a single deployment off to a coding agent or CI job, mint a
deploy key scoped just to it and save it to `.env.local` as `BIJECTION_DEPLOY_KEY`:

```bash theme={"theme":{"light":"github-light-default","dark":"github-dark-default"}}
bijection deployment token create agent-token --save-env
```

Once that env var is set, subsequent `bijection` commands run against that
deployment only. See
[Creating and deleting deploy keys from the CLI](/cli/deploy-key-types#from-the-cli)
for the full options.

## Deployment types

There are three types of cloud deployments in Bijection:

<table>
  <caption>Default settings</caption>

  <thead>
    <tr>
      <th scope="row">Type</th>

      <th scope="col">
        Dev
      </th>

      <th scope="col">
        Preview
      </th>

      <th scope="col">
        Production
      </th>
    </tr>
  </thead>

  <tbody>
    <tr>
      <th scope="row" align="left">
        Reference
      </th>

      <td>
        <code>
          dev/<em>\[creator]</em>
        </code>
      </td>

      <td>
        <code>
          preview/<em>\[branch]</em>
        </code>
      </td>

      <td>
        <code>production</code>
      </td>
    </tr>

    <tr>
      <th scope="row" align="left">
        Expiration
      </th>

      <td>—</td>
      <td>5 or 14 days, depending on your team's limits</td>
      <td>—</td>
    </tr>

    <tr>
      <th scope="row" align="left">
        Console permissions
      </th>

      <td colSpan={2}>Can be edited by every team member</td>
      <td>Can only be edited by project or team admins</td>
    </tr>

    <tr>
      <th scope="row" align="left">
        Server logs in clients
      </th>

      <td colSpan={2}>Server logs are sent to the client</td>

      <td>
        Server logs are <em>not</em> sent to the client
      </td>
    </tr>

    <tr>
      <th scope="row" align="left">
        Server errors
      </th>

      <td colSpan={2}>Details of server errors are sent to the client</td>

      <td>
        Details of server errors are <em>not</em> sent to the client (unless
        the error is wrapped in{" "}

        <a href="/functions/error-handling/application-errors#throwing-application-errors">
          <code>BijectionError</code>
        </a>

        )
      </td>
    </tr>

    <tr>
      <th scope="row" align="left">
        Console edit confirmation
      </th>

      <td colSpan={2}>No protection against accidental edits</td>
      <td>Asks for confirmation before editing</td>
    </tr>
  </tbody>
</table>

<Info>
  **Customize settings**

  The table above shows the <em>default</em> settings for deployments in a type.
  You can modify the settings of an individual deployment from the deployment’s
  settings page in the console.
</Info>

## Limits

Every deployment you create counts towards the
[deployment limit](/production/state/limits) of your team.

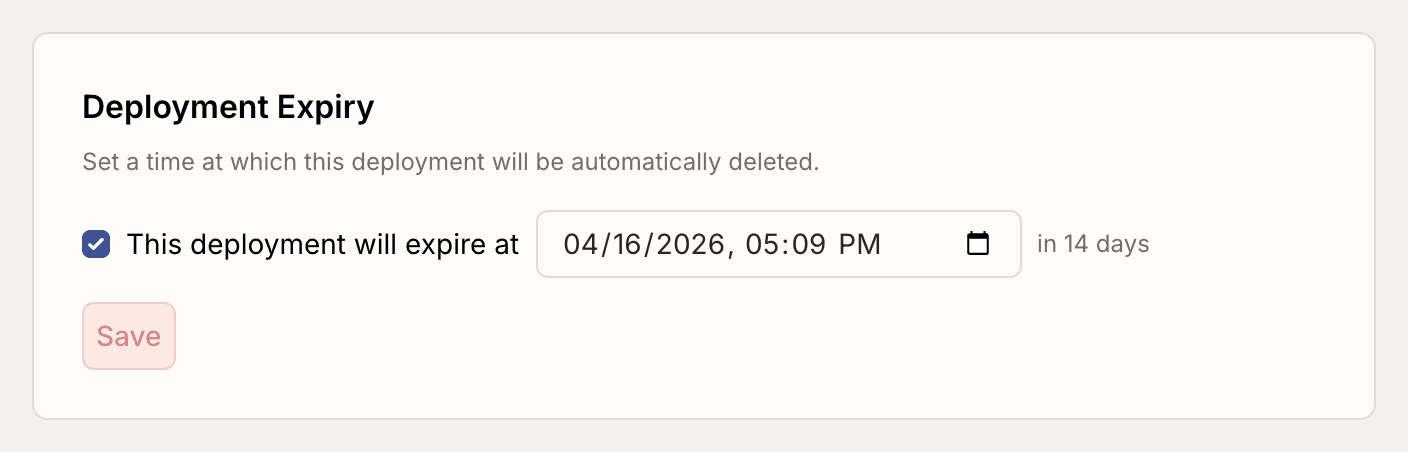
You can set an expiration date when creating a deployment with `--expiration`.
Run `bijection deployment create --help` to learn more.

You can change the expiration time for an existing deployment in the console
deployment settings.

<Frame>
  <img src="https://mintcdn.com/bijection-95ba84d3/z1QH_TSyFd7Yth27/screenshots/components_deployment_expiry.png?fit=max&auto=format&n=z1QH_TSyFd7Yth27&q=85&s=5ef7ff8b59c1885696aa6a554f4a1d67" alt="Deployment expiry in the console" width="1408" height="452" data-path="screenshots/components_deployment_expiry.png" />
</Frame>