> ## Documentation Index
> Fetch the complete documentation index at: https://docs.bijection.com/llms.txt
> Use this file to discover all available pages before exploring further.
# Data
> View, edit, and manage database tables and documents in the console
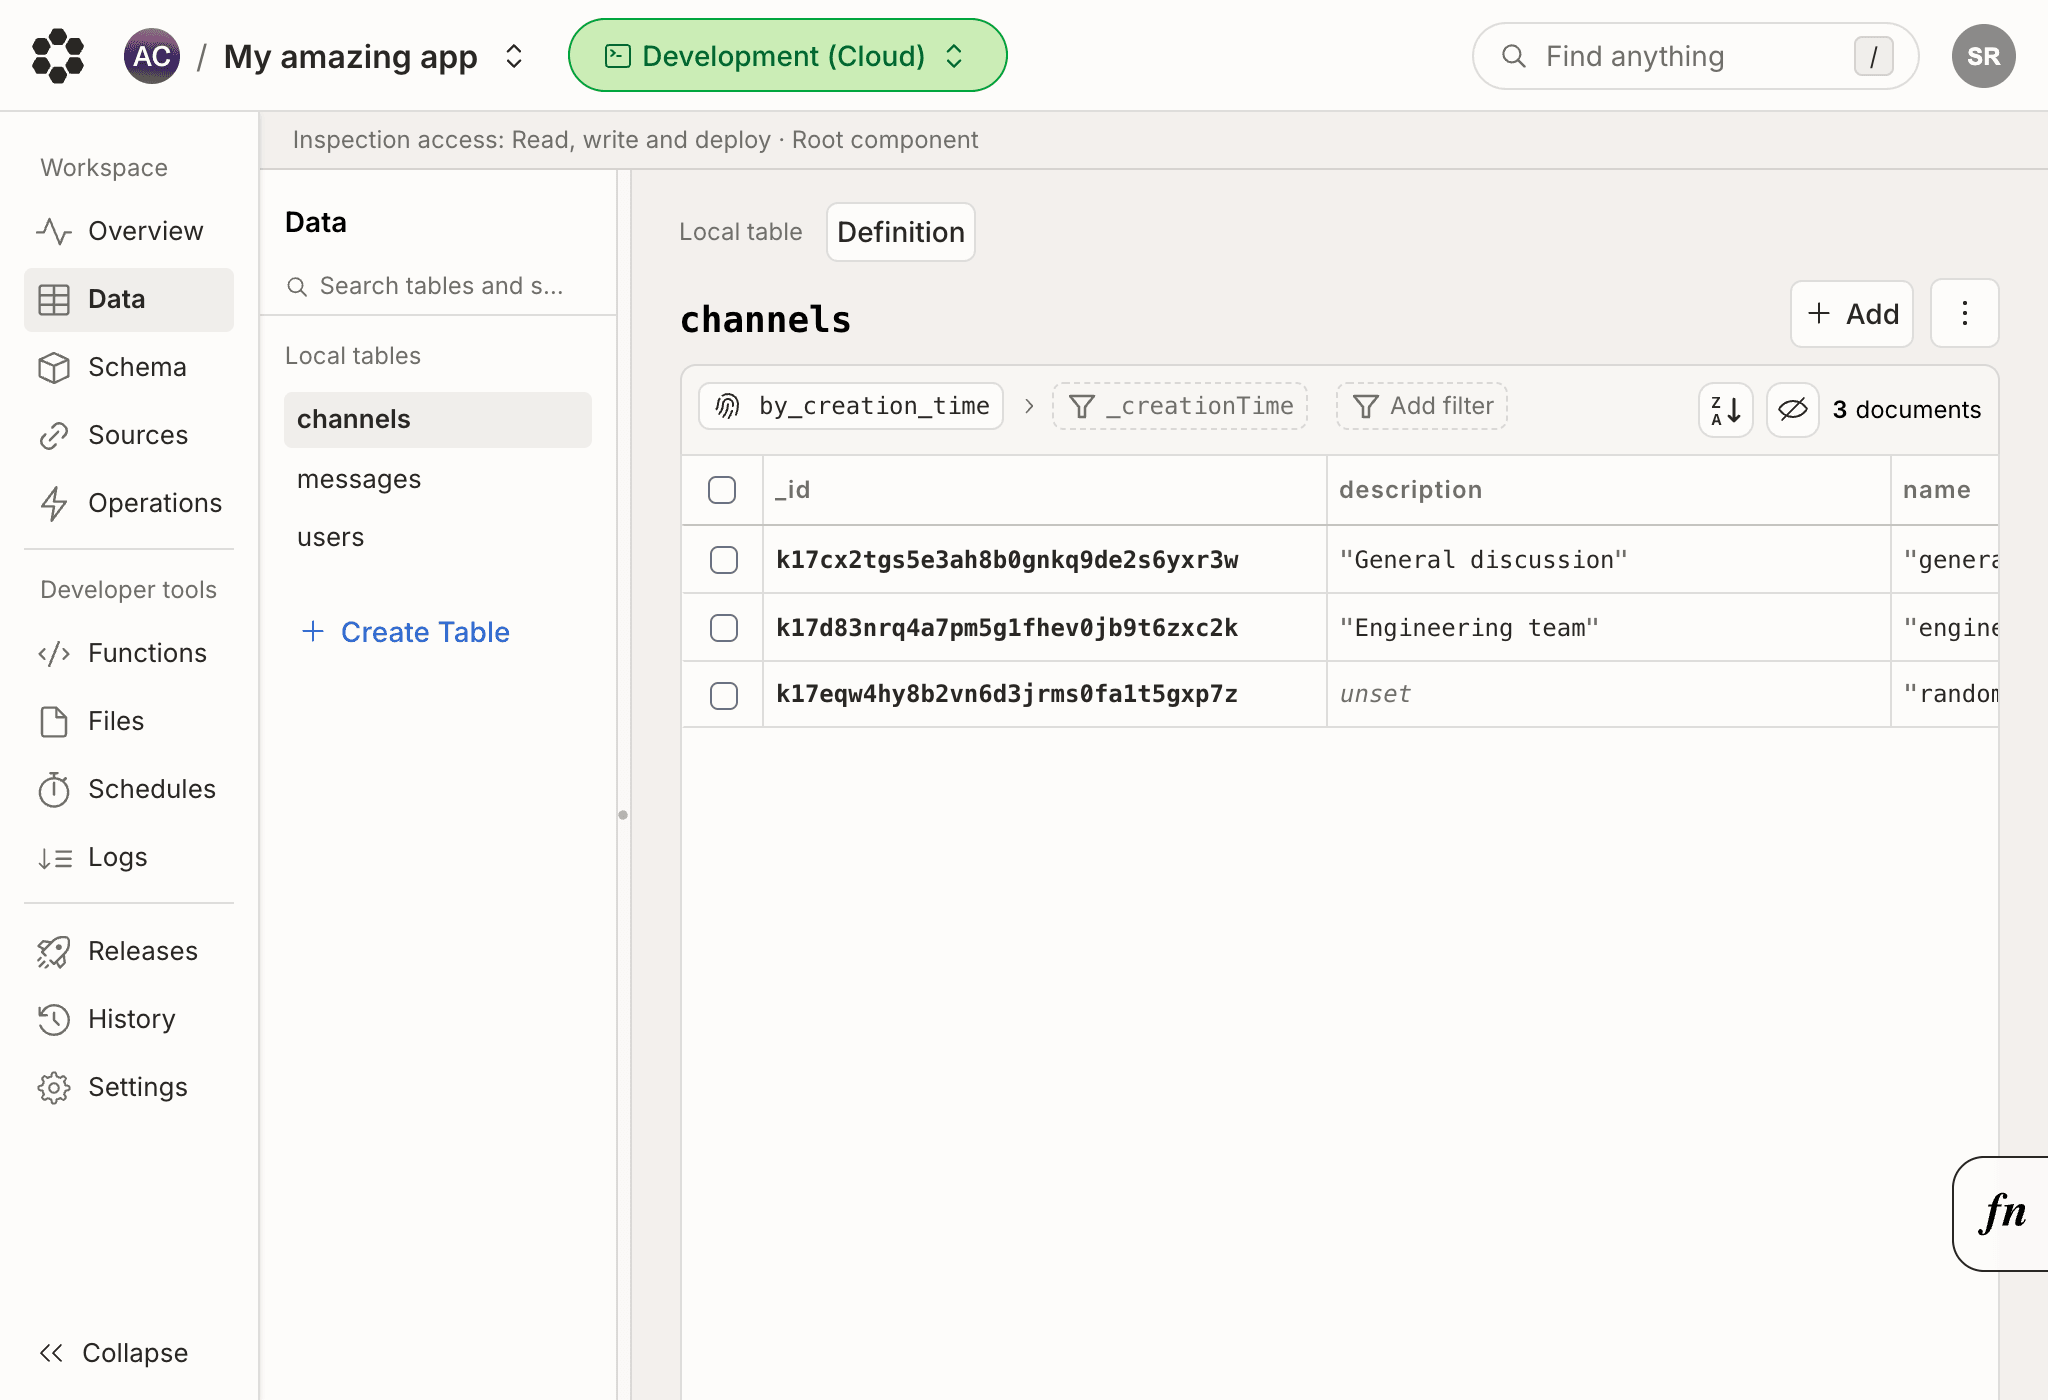 The [data page](https://console.bijection.com) allows you to view
and manage all of your tables and documents.
On the left side of the page is a list of your tables. Clicking on a table will
allows you to create, view, update, and delete documents in that table.
You may drag-and-drop the column headers in each table to visually re-order the
data.
A readonly view of the data page is available in the
[command line](/cli/reference/data).
```sh theme={"theme":{"light":"github-light-default","dark":"github-dark-default"}}
bijection data [table]
```
## Filtering documents
You may filters documents on the data page by clicking the "Filter" button on
the top of the page.
The [data page](https://console.bijection.com) allows you to view
and manage all of your tables and documents.
On the left side of the page is a list of your tables. Clicking on a table will
allows you to create, view, update, and delete documents in that table.
You may drag-and-drop the column headers in each table to visually re-order the
data.
A readonly view of the data page is available in the
[command line](/cli/reference/data).
```sh theme={"theme":{"light":"github-light-default","dark":"github-dark-default"}}
bijection data [table]
```
## Filtering documents
You may filters documents on the data page by clicking the "Filter" button on
the top of the page.
 All fields in a document are filterable by the operations supported in Bijection
query syntax. [Equality](/database/reading-data/filters#equality-conditions)
and [comparisons](/database/reading-data/filters#comparisons) share the same
rules when filtering in the console as a query using the Bijection client. You
may also filter based on the type of the field.
To add a filter, click the `+` next to an existing filter. If you add more than
one condition, they will be evaluated using the `and` operation.
For each filter, you must select a field to filter by, operation, and comparison
value. In the third input box (selecting a value), you may enter a valid Bijection
value, such as `"a string"`, `123`, or even a complex object, such as
`{ a: { b: 2 } }`
When filtering by `_creationTime`, a date picker will be displayed instead of
the normal JavaScript syntax input box. Comparisons for `_creationTime` are made
at the nanosecond granularity, so if you'd like to filter to an exact time, try
adding two filter conditions for `creationTime >= $time` and
`creationTime <= $time + 1 minute`.
## Writing custom queries
You can write a [query](/database/reading-data/reading-data) directly in the
console. This allows you to perform arbitrary filtering and transformation of
the data, including sorting, joins, grouping and aggregations.
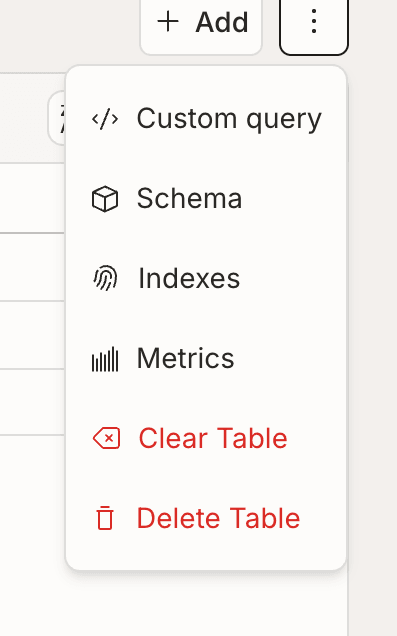
In the `⋮` overflow menu at the top of the data page click on the “Custom query"
option.
All fields in a document are filterable by the operations supported in Bijection
query syntax. [Equality](/database/reading-data/filters#equality-conditions)
and [comparisons](/database/reading-data/filters#comparisons) share the same
rules when filtering in the console as a query using the Bijection client. You
may also filter based on the type of the field.
To add a filter, click the `+` next to an existing filter. If you add more than
one condition, they will be evaluated using the `and` operation.
For each filter, you must select a field to filter by, operation, and comparison
value. In the third input box (selecting a value), you may enter a valid Bijection
value, such as `"a string"`, `123`, or even a complex object, such as
`{ a: { b: 2 } }`
When filtering by `_creationTime`, a date picker will be displayed instead of
the normal JavaScript syntax input box. Comparisons for `_creationTime` are made
at the nanosecond granularity, so if you'd like to filter to an exact time, try
adding two filter conditions for `creationTime >= $time` and
`creationTime <= $time + 1 minute`.
## Writing custom queries
You can write a [query](/database/reading-data/reading-data) directly in the
console. This allows you to perform arbitrary filtering and transformation of
the data, including sorting, joins, grouping and aggregations.
In the `⋮` overflow menu at the top of the data page click on the “Custom query"
option.
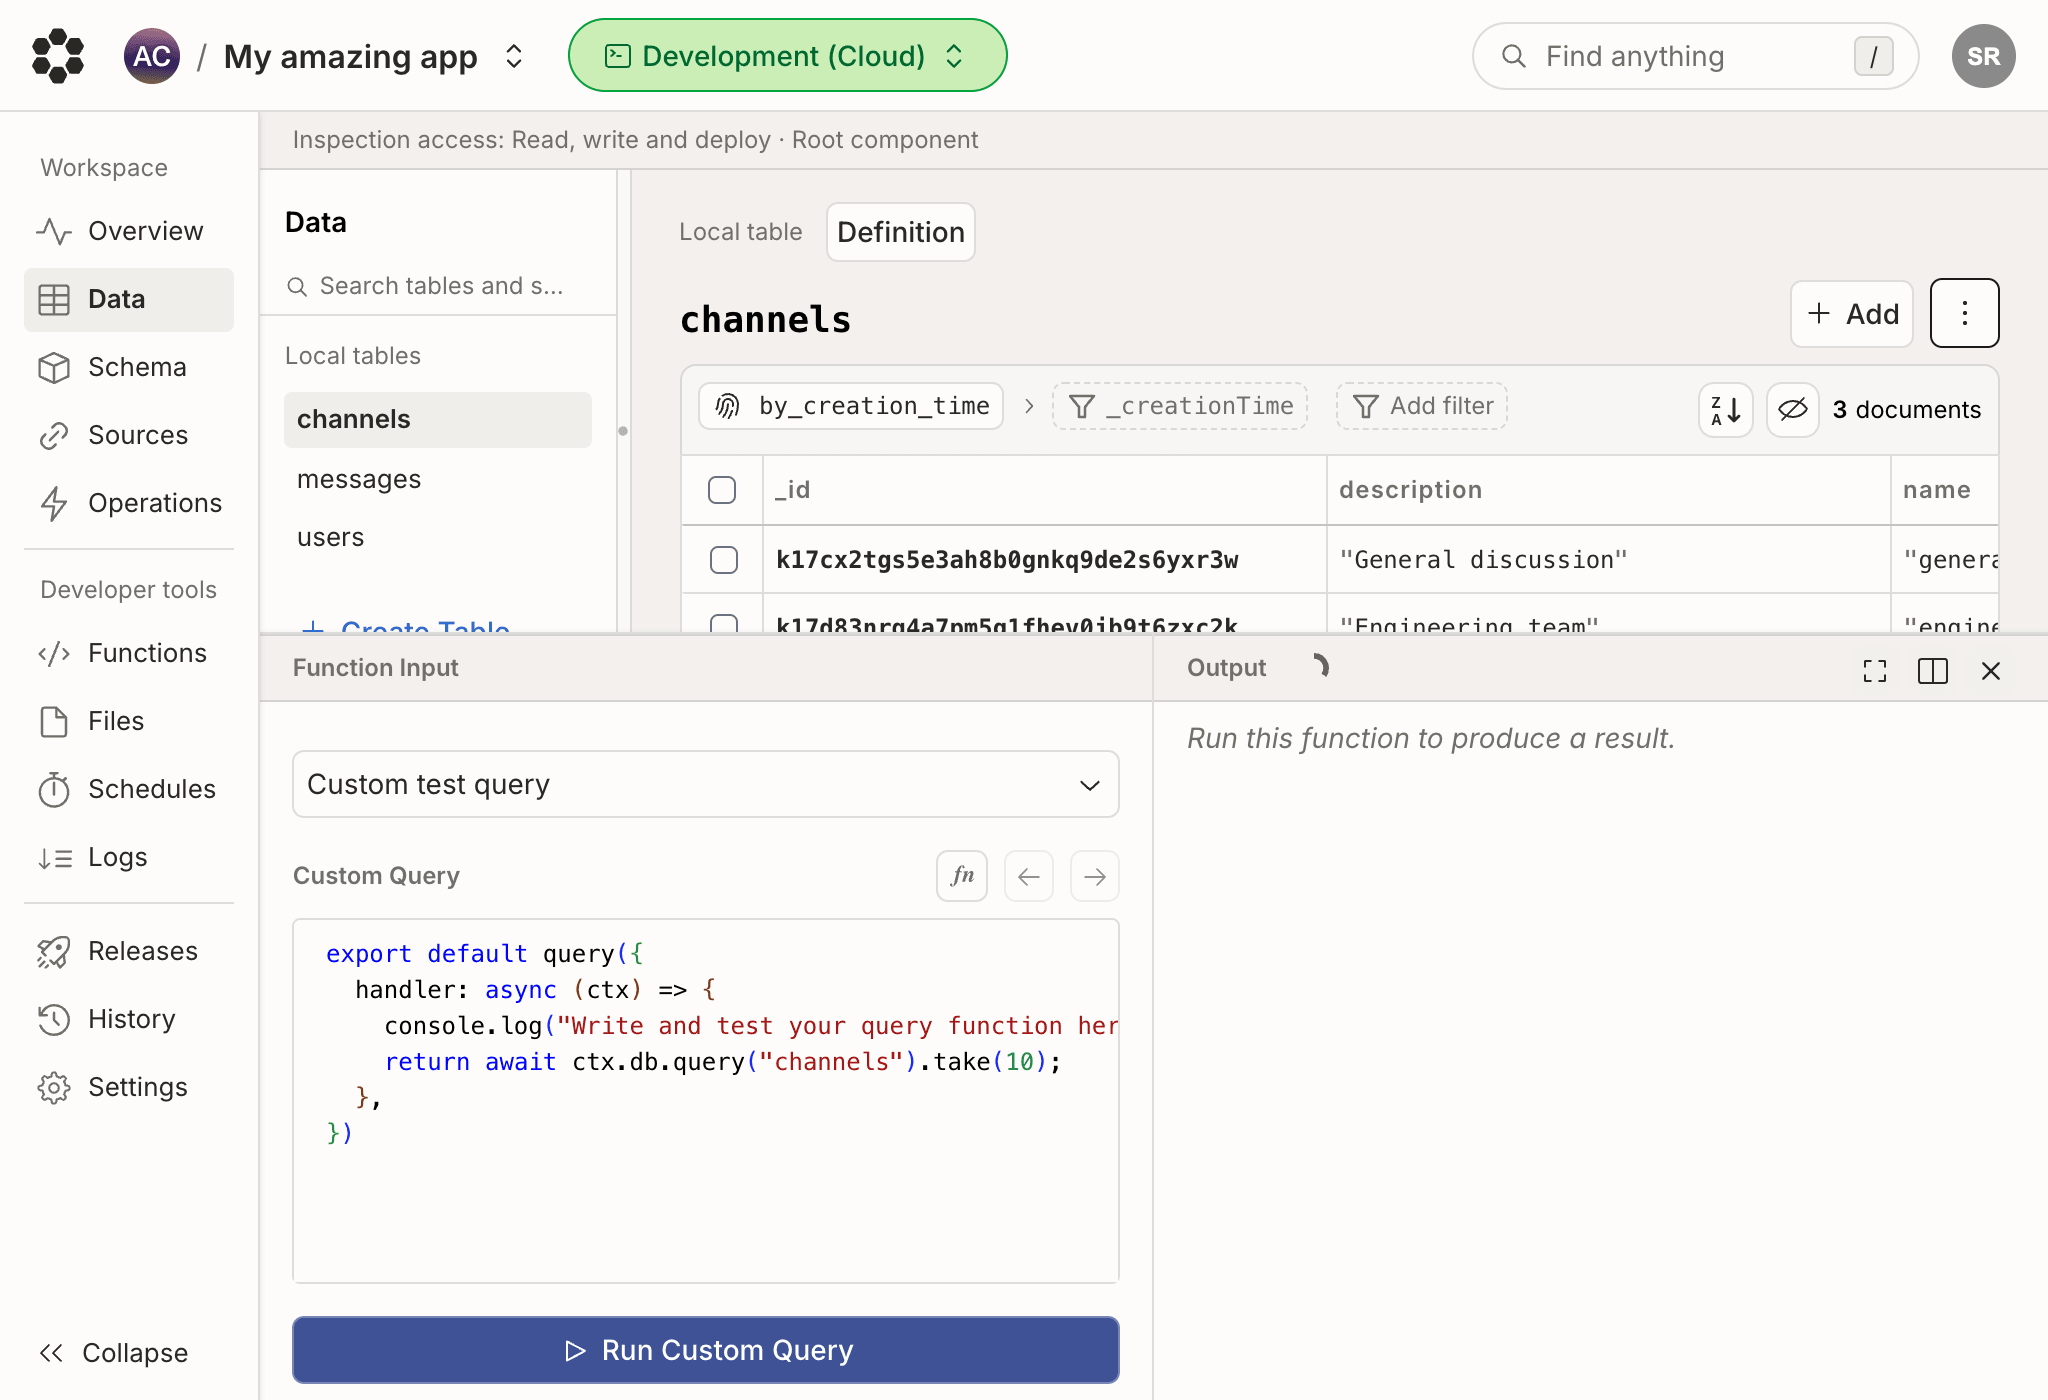
 This opens the same UI used for
[running your deployed functions](/dashboard/deployments/functions#running-functions),
but with the “Custom test query" option selected, which lets you edit the source
code for the query. This source code will be sent to your deployment and
executed when you click on the “Run Custom Query" button.
This opens the same UI used for
[running your deployed functions](/dashboard/deployments/functions#running-functions),
but with the “Custom test query" option selected, which lets you edit the source
code for the query. This source code will be sent to your deployment and
executed when you click on the “Run Custom Query" button.
 If you're not on the data page, you can still open this UI via the persistent
*fn* button shown on the bottom right of all deployment pages. The keyboard
shortcut to open the function runner is Ctrl + \` (backtick).
## Creating tables
You may create a table from the console by clicking the "Create Table" button
and entering a new name for the table.
## Creating documents
You may add individual documents to the table using the “Add Documents" button
located in the data table's toolbar.
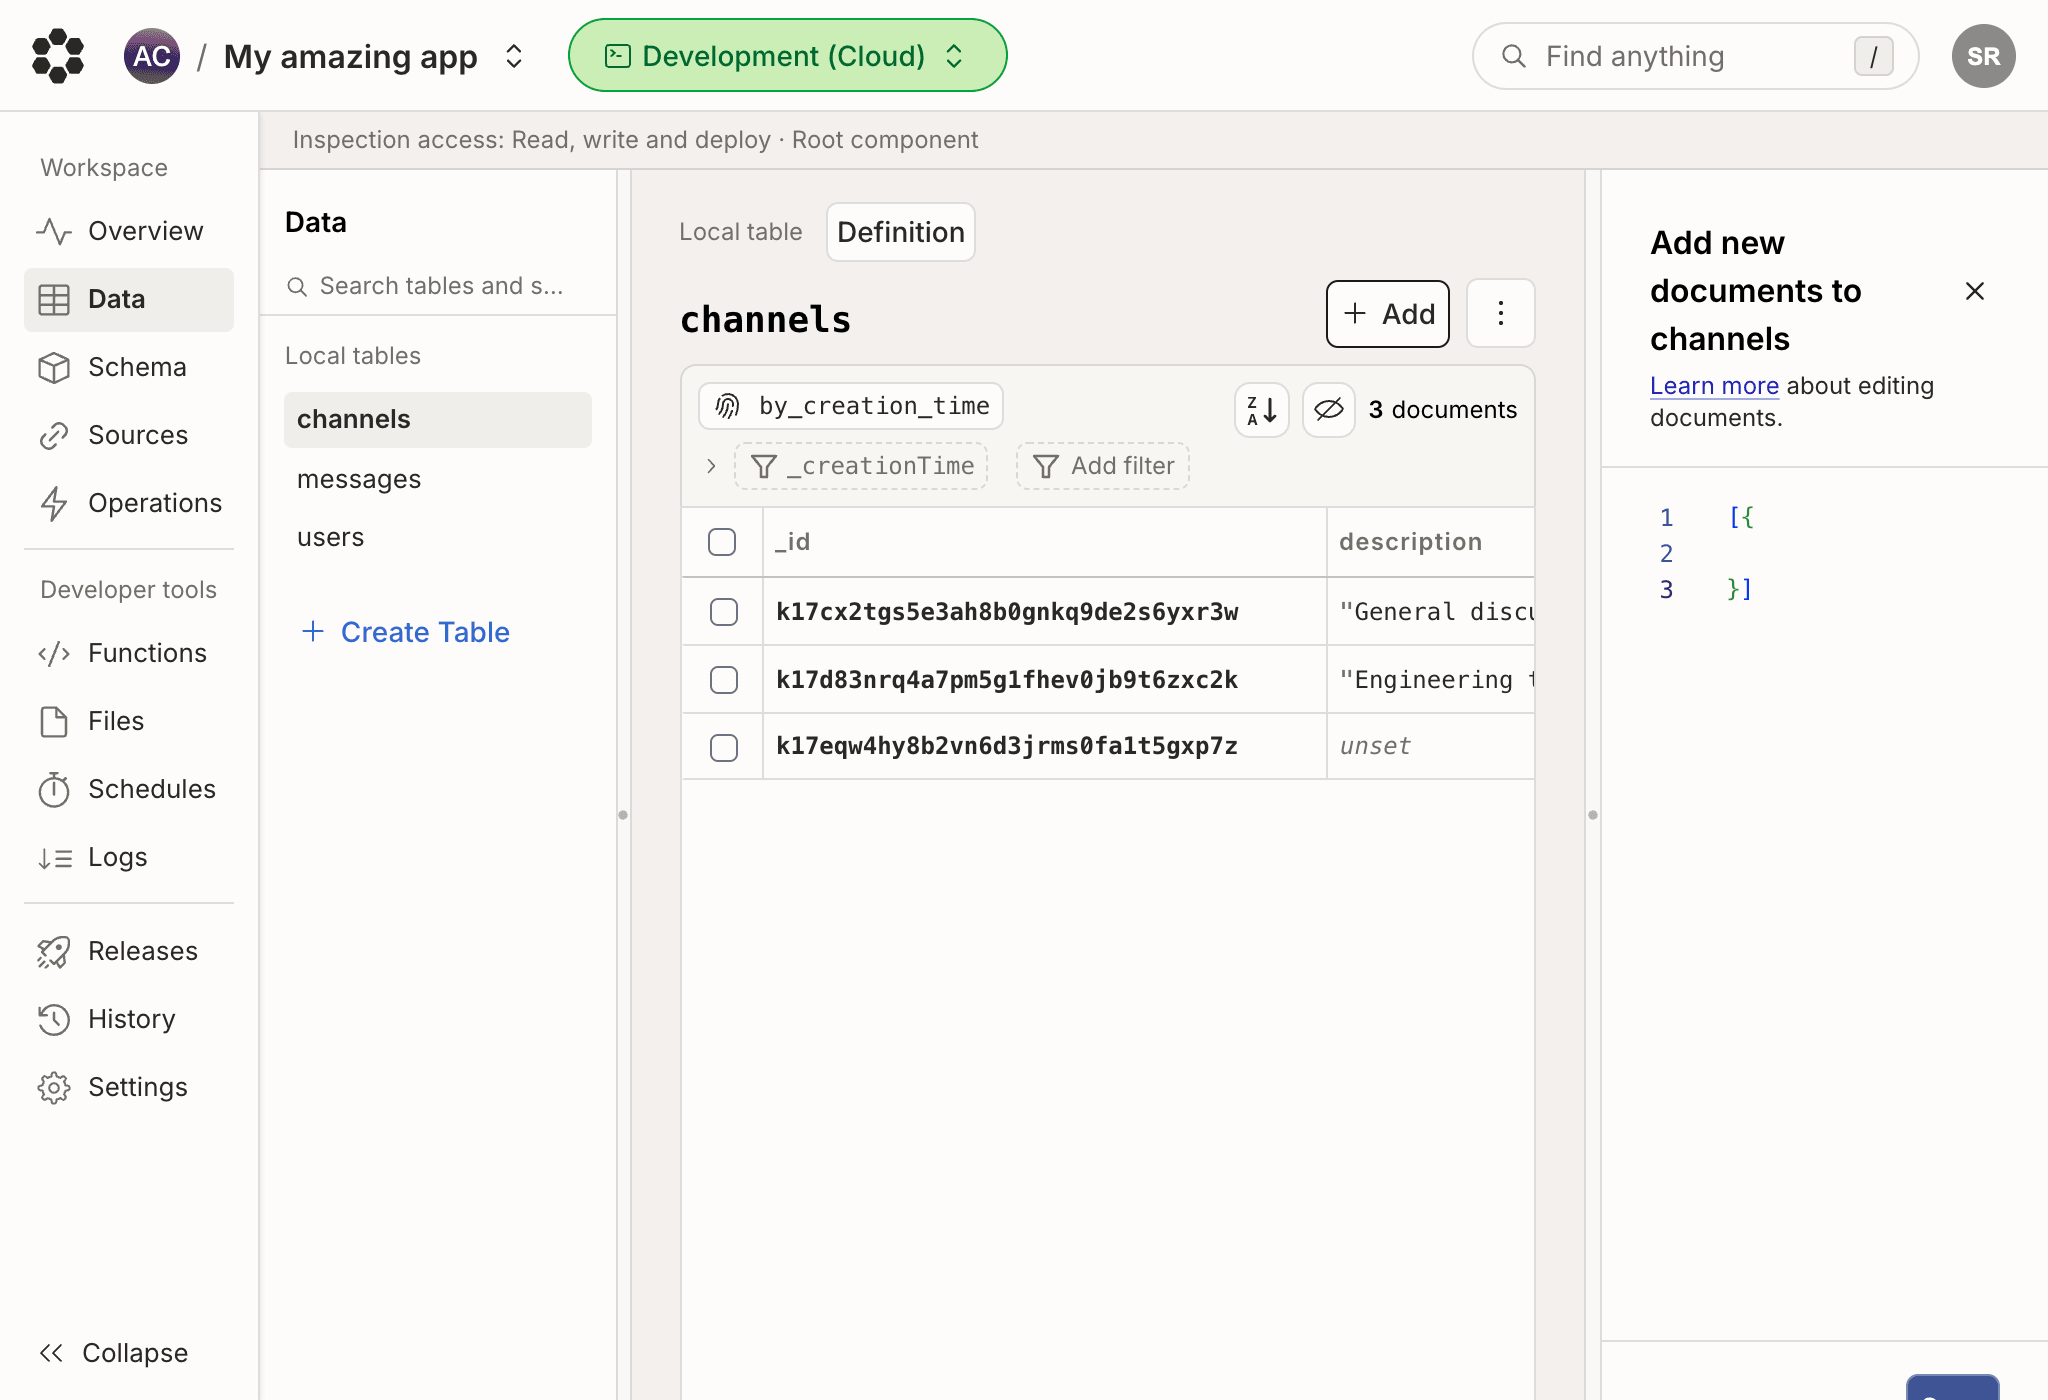
Once you click “Add Documents" a side panel will open, allowing you to add new
documents to your table using JavaScript syntax. To add more than one document
add a time, add new objects to the array in the editor.
If you're not on the data page, you can still open this UI via the persistent
*fn* button shown on the bottom right of all deployment pages. The keyboard
shortcut to open the function runner is Ctrl + \` (backtick).
## Creating tables
You may create a table from the console by clicking the "Create Table" button
and entering a new name for the table.
## Creating documents
You may add individual documents to the table using the “Add Documents" button
located in the data table's toolbar.
Once you click “Add Documents" a side panel will open, allowing you to add new
documents to your table using JavaScript syntax. To add more than one document
add a time, add new objects to the array in the editor.
 ## Quick actions (context menu)
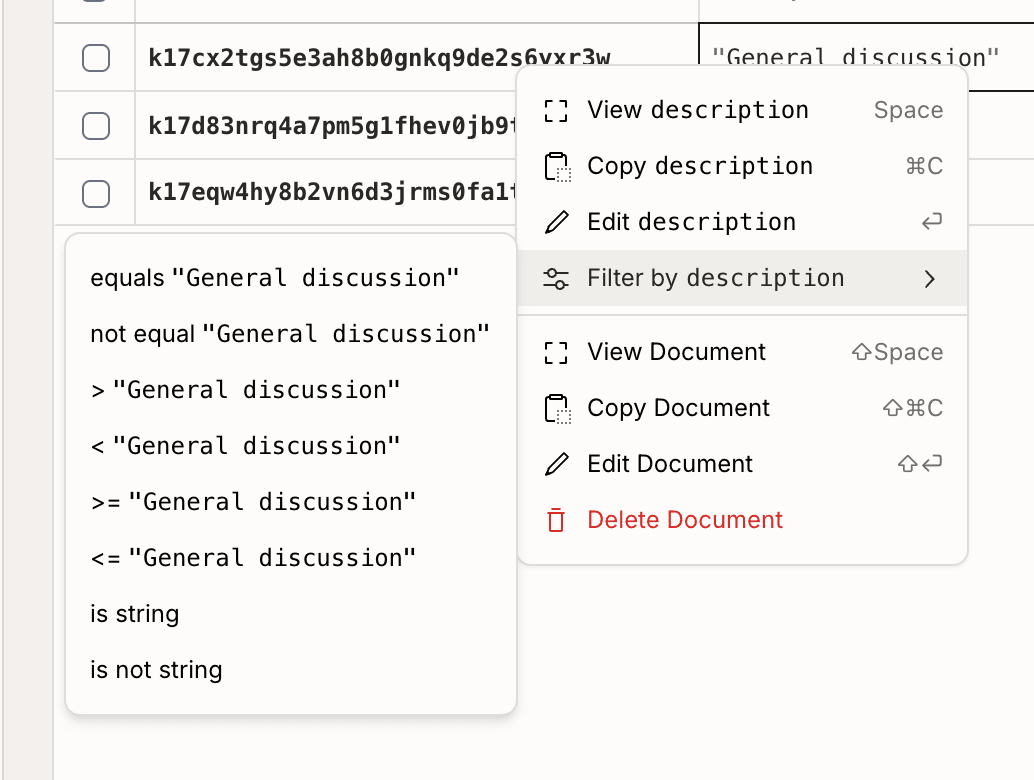
You can right-click on a document or value to open a context menu with quick
actions, like copying values, quickly filtering by the selected value, and
deleting documents.
## Quick actions (context menu)
You can right-click on a document or value to open a context menu with quick
actions, like copying values, quickly filtering by the selected value, and
deleting documents.
 ## Editing a cell
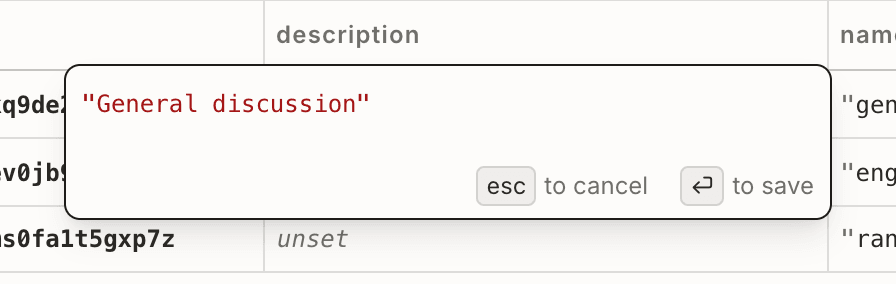
To edit a cell's value, double-click on the cell in the data table, or press the
Enter key while it’s selected. You can change the selected cell by using the
arrow keys.
You can change the value by editing inline, and pressing enter to save.
You can even edit the type of your value here, as long as it satisfies your
[schema](/database/schemas) — try replacing a string with an object!
## Editing a cell
To edit a cell's value, double-click on the cell in the data table, or press the
Enter key while it’s selected. You can change the selected cell by using the
arrow keys.
You can change the value by editing inline, and pressing enter to save.
You can even edit the type of your value here, as long as it satisfies your
[schema](/database/schemas) — try replacing a string with an object!
 ## Editing a document
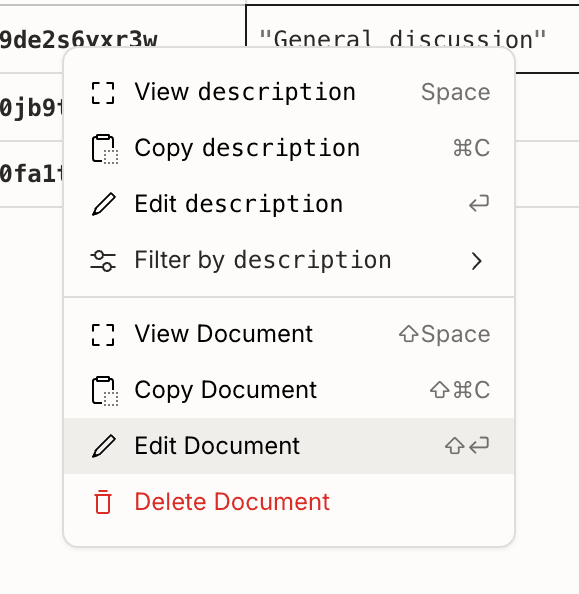
To edit multiple fields in a document at the same time, hover over the document
and right-click to open the context menu. From there you can click on "Edit
Document".
## Editing a document
To edit multiple fields in a document at the same time, hover over the document
and right-click to open the context menu. From there you can click on "Edit
Document".
 ## Adding references to other documents
To reference another document, use the string ID of the document you want to
reference.
You can copy the ID by clicking on its cell and pressing ⌘C / Ctrl+C.
## Bulk editing documents
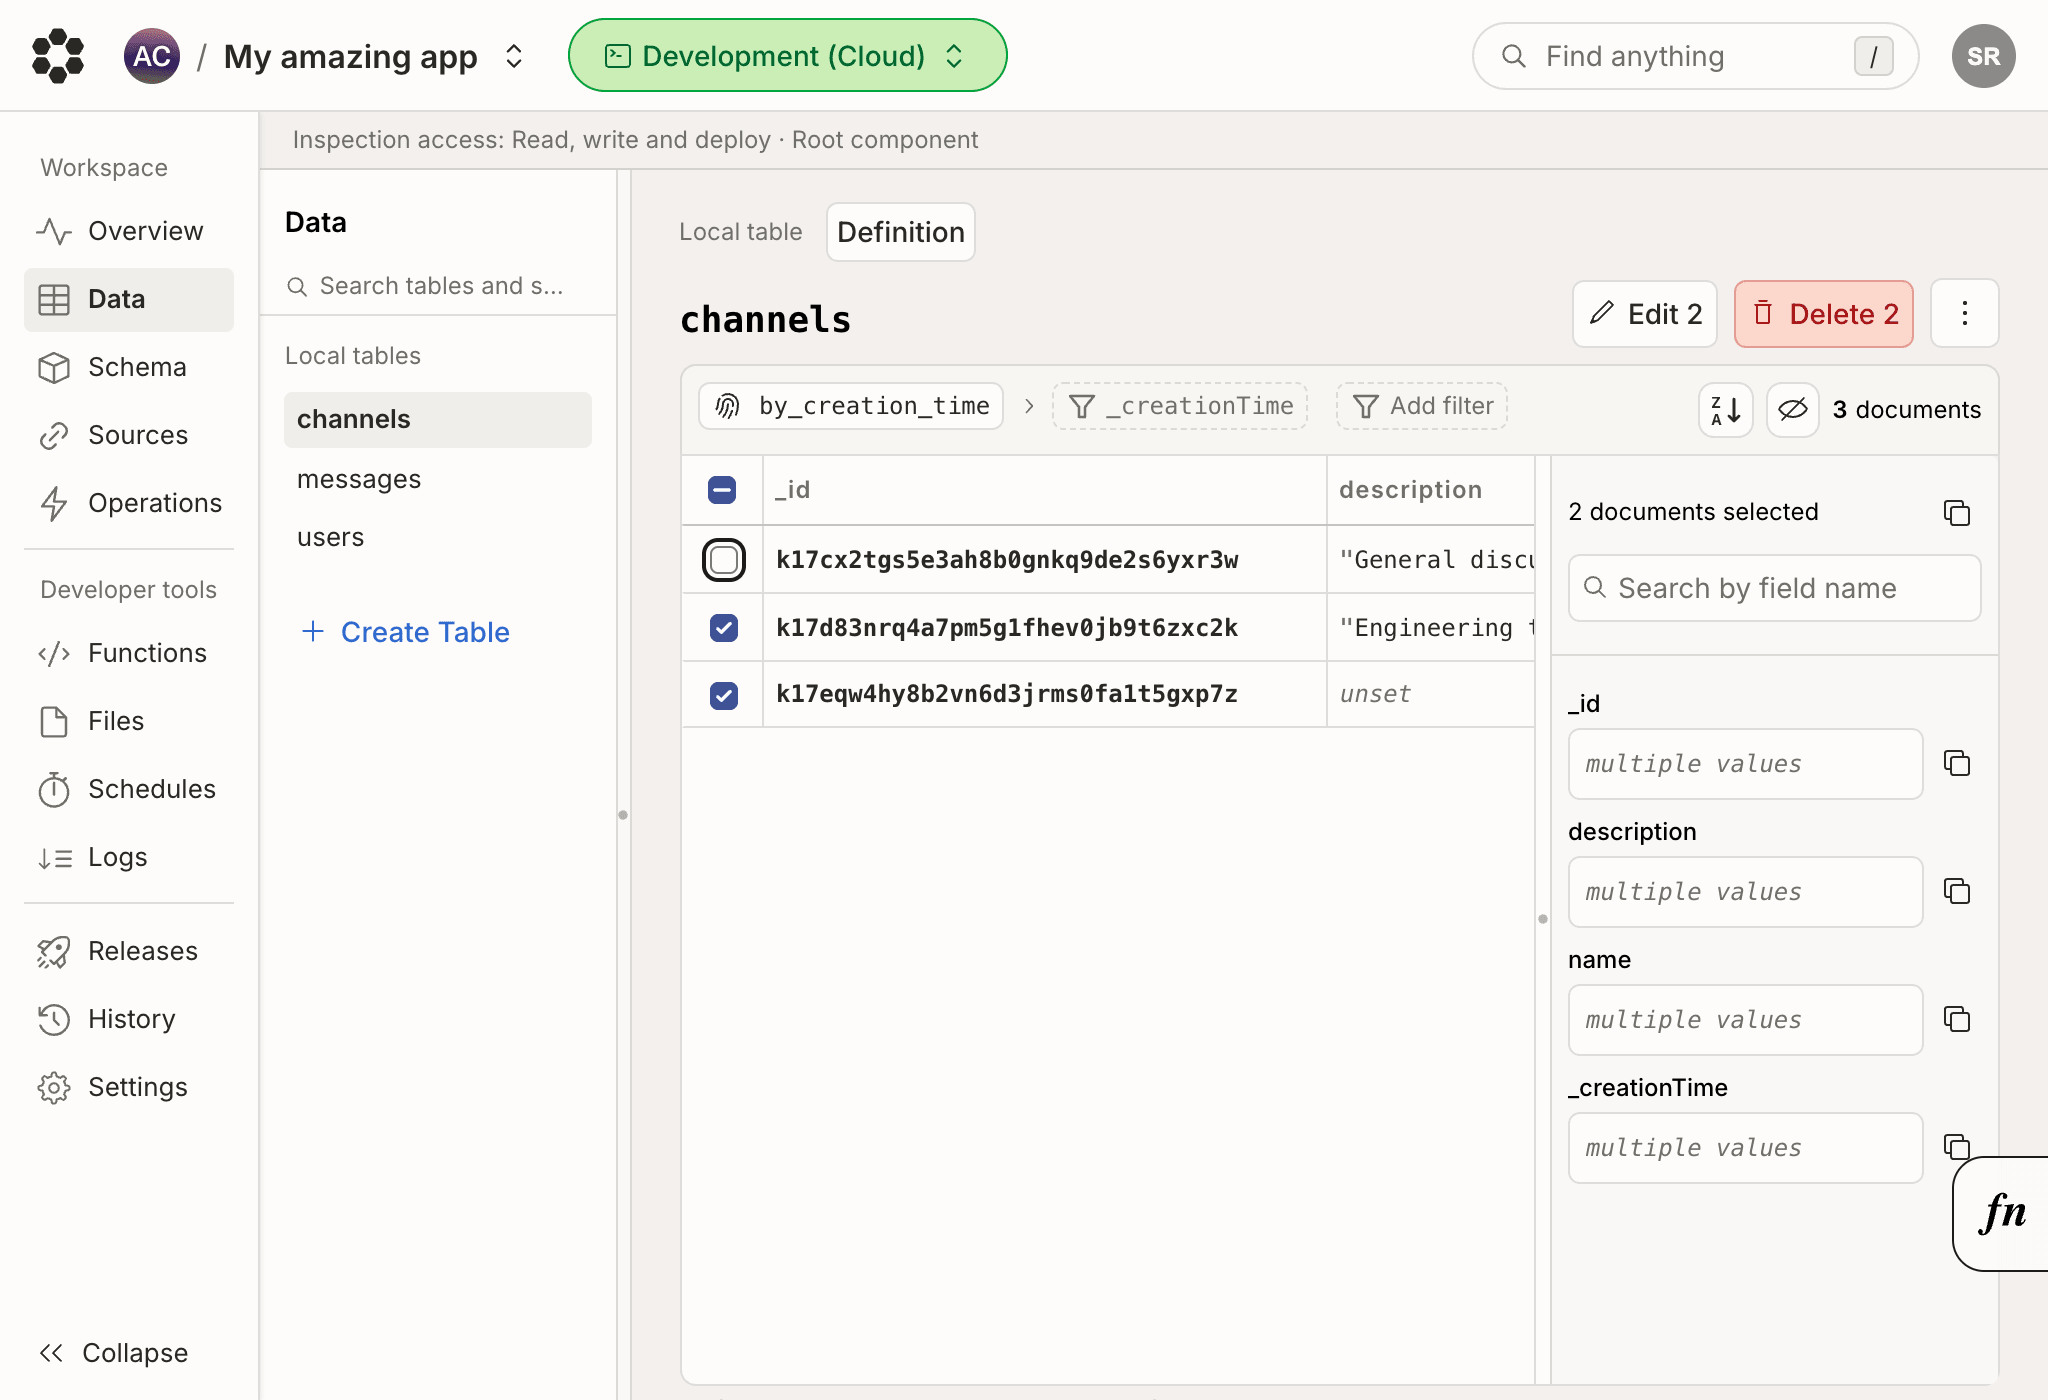
You can edit multiple or all documents at once. To select all documents click on
the checkbox in the table header row. To select individual documents hover over
the left-most cell and click the checkbox that appears. To select multiple
adjacent documents at once, press the Shift key when clicking on the checkbox.
When at least one document is selected, the “(Bulk) Edit Document(s)" button
will be visible in the table toolbar. Click the button and an editor will appear
on the right hand side.
## Adding references to other documents
To reference another document, use the string ID of the document you want to
reference.
You can copy the ID by clicking on its cell and pressing ⌘C / Ctrl+C.
## Bulk editing documents
You can edit multiple or all documents at once. To select all documents click on
the checkbox in the table header row. To select individual documents hover over
the left-most cell and click the checkbox that appears. To select multiple
adjacent documents at once, press the Shift key when clicking on the checkbox.
When at least one document is selected, the “(Bulk) Edit Document(s)" button
will be visible in the table toolbar. Click the button and an editor will appear
on the right hand side.
 ## Deleting documents
When at least one document is selected (see above), the “Delete Document(s)"
button will be visible in the table toolbar. Click the button to delete
documents. If you're editing data in a production deployment a confirmation
dialog will appear before the documents are deleted.
## Clear a table
You can also delete all documents by clicking on the `⋮` overflow menu at the
top of the data page and clicking "Clear Table". This action will delete all
documents in the table, without deleting the table itself.
In production environments, the Bijection console will have you type in the name
of the table before deletion.
## Delete a table
**This is a permanent action**
Deleting a table is irreversible. In production environments, the Bijection
console will have you type in the name of the table before deletion.
The "Delete table" button can be found by clicking on the `⋮` overflow menu at
the top of the data page. This action will delete all documents this table, and
remove the table from your list of tables. If this table had indexes, you will
need to redeploy your bijection functions (by running `bijection deploy` or
`bijection dev` for production or development, respectively) to recreate the
indexes.
## View the schema of a table
The "Schema" button can be found by clicking on the `⋮` overflow menu at the top
of the data page.
This button will open a panel showing the saved and generated
[schemas](/database/schemas) associated with the selected table.
To see the [schema](/database/schemas) of your whole deployment, including
the relationships between tables, use the
[Schema page](/dashboard/deployments/schema).
## View the indexes of a table
The "Indexes" button can be found by clicking on the `⋮` overflow menu at the
top of the data page.
This button will open a panel showing the
[indexes](/database/reading-data/indexes/indexes) associated with the
selected table.
Indexes that have not completed backfilling will be accompanied by a loading
spinner next to their name.
## Deleting documents
When at least one document is selected (see above), the “Delete Document(s)"
button will be visible in the table toolbar. Click the button to delete
documents. If you're editing data in a production deployment a confirmation
dialog will appear before the documents are deleted.
## Clear a table
You can also delete all documents by clicking on the `⋮` overflow menu at the
top of the data page and clicking "Clear Table". This action will delete all
documents in the table, without deleting the table itself.
In production environments, the Bijection console will have you type in the name
of the table before deletion.
## Delete a table
**This is a permanent action**
Deleting a table is irreversible. In production environments, the Bijection
console will have you type in the name of the table before deletion.
The "Delete table" button can be found by clicking on the `⋮` overflow menu at
the top of the data page. This action will delete all documents this table, and
remove the table from your list of tables. If this table had indexes, you will
need to redeploy your bijection functions (by running `bijection deploy` or
`bijection dev` for production or development, respectively) to recreate the
indexes.
## View the schema of a table
The "Schema" button can be found by clicking on the `⋮` overflow menu at the top
of the data page.
This button will open a panel showing the saved and generated
[schemas](/database/schemas) associated with the selected table.
To see the [schema](/database/schemas) of your whole deployment, including
the relationships between tables, use the
[Schema page](/dashboard/deployments/schema).
## View the indexes of a table
The "Indexes" button can be found by clicking on the `⋮` overflow menu at the
top of the data page.
This button will open a panel showing the
[indexes](/database/reading-data/indexes/indexes) associated with the
selected table.
Indexes that have not completed backfilling will be accompanied by a loading
spinner next to their name.